
Introduction to LogView++
(see also LogView++ Presentation)
Graphical User Interface:
LogView++ is basically a kind of petrophysical software that commonly used to manipulate LAS data that is resulted from oil & gas well logging. In the first version (2010.12), it was developed mostly to helps engineer, geologist, or petrophysicist to do a single well log plotting. However, in the latest version (2012.2), LogView++ has been extended by some feature such as plotting completion, zonation / layering, and also cross-sectioning. In this tutorial, version used for explanation is 2012.2.
Generally, the graphical interface of LogView++ is divided into 3 areas. The first area is the main menu bar (ribbon bar) that contain many of icons that give you direct link to many features in LogView++. Following pictures are all tool bar available in the ribbon bar.

This LogView++ file management is based on project file. Above “Project” ribbon bar lets you open, save, and close the project. And this ribbon also allows you to see the diagnostic log in order to understand some hidden message delivered by LogView++.

Above “Well” menu enables you to make new well, as well as import and export well header from file.

Above “Log Data” menu bar deals everything related to log (LAS File) data.

Zonation menu is dealing with everything about zone or layers or well top.

Completion ribbon bar gives an access to completion editing, including completion database management.

Log template menu of course deal with log template.

And the last bar, helps give you access to main documentation of LogView++ and about dialog.
File Type Supported:
There are some file formats that are currently supported by LogView++ as follows.
– Project File (*.pro++)
– LAS File (*.las)
– Well header (text file *.*)
– Completion Package (text file *.*)
– Log template (*.template)
– Zone list (text file *.*)
LogView++ Main Features:
Following list is the main feature that currently supported by LogView++…
- Manipulating Log Data
Manipulating log data includes modifying the content of the LAS File by renaming column, deleting column, calculating new column based on existing column, creating partial log, combining 2 LAS files, and etc. Detail procedures of this feature would be explained in the next tutorial. The following screenshot shows the main log editor.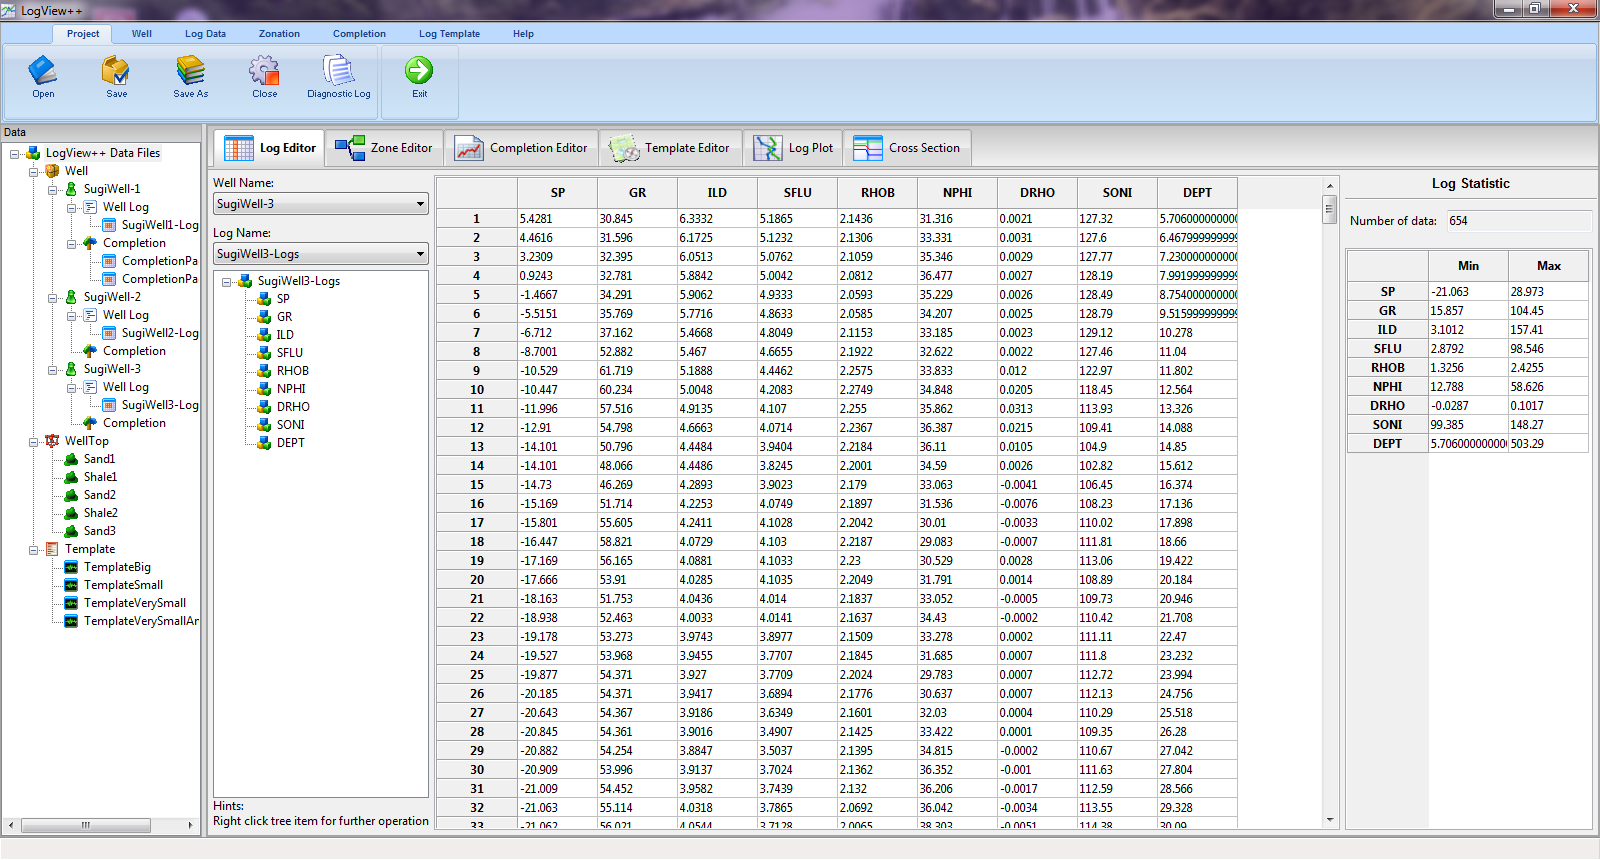
- Manipulating Zone / Layer / Well Top
Manipulating zone including export & import zone data, setting zone color and style. It is very important for you to make cross-section. Detailed tutorial of zone editing will be discussed further.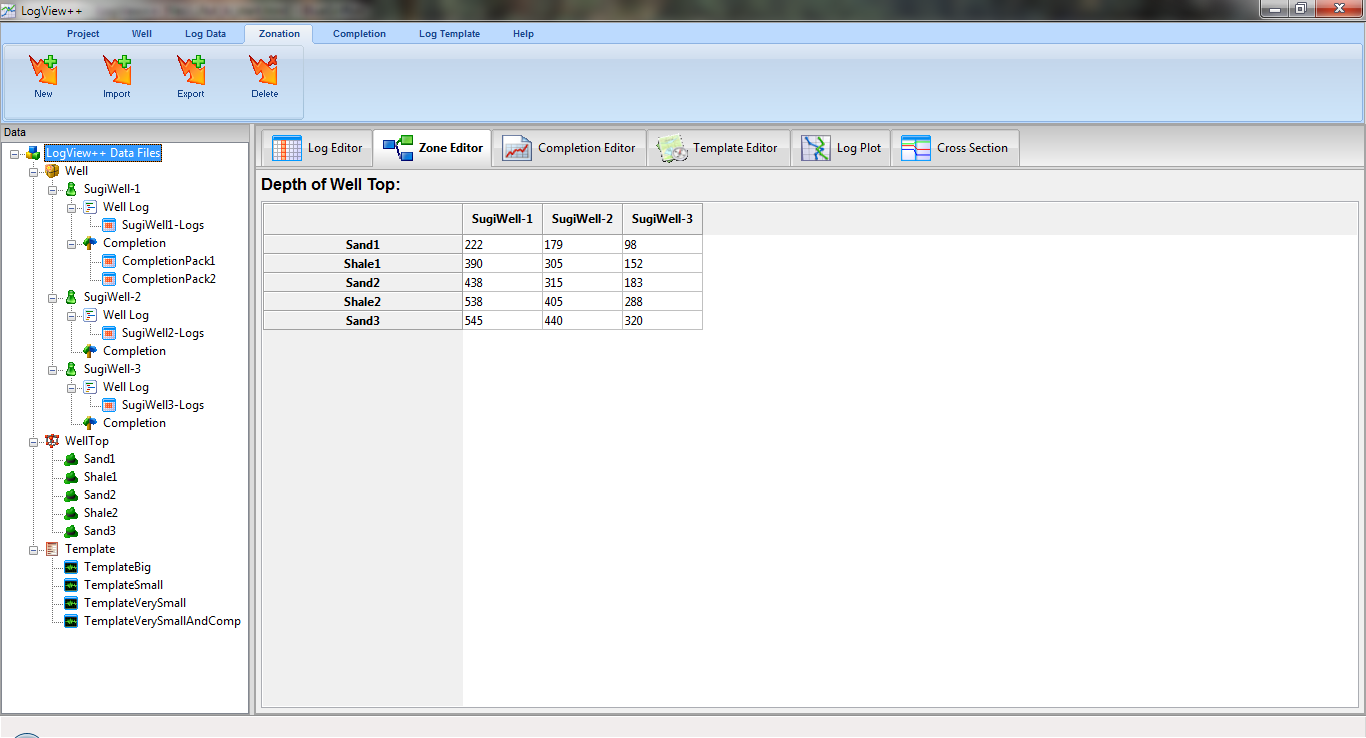
- Manipulating Well Completion Data
Completion editor is very important editor before creating well sketch in the log plot. This completion editor is very customizable. You can create your own completion database, and also support multi-completion package for one well. Detailed procedures of editing completion package and database will be discussed in this tutorial.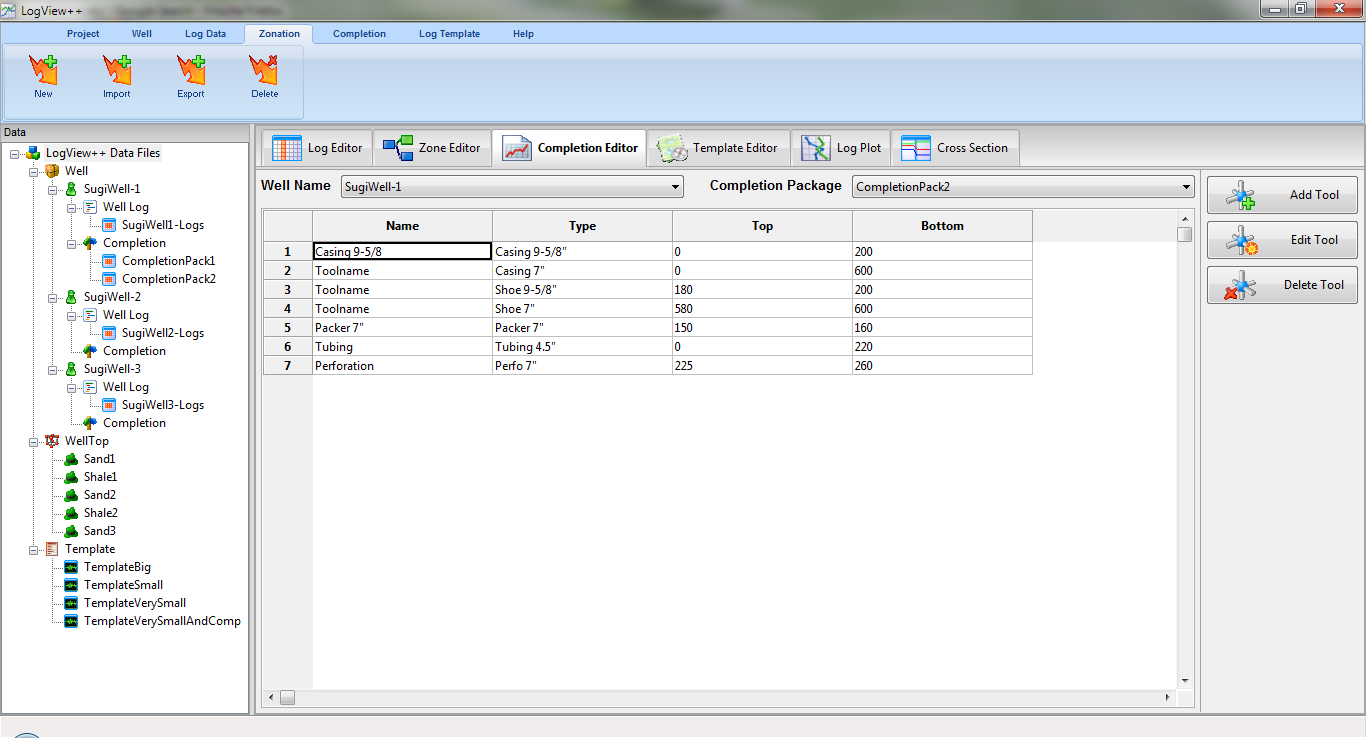
- Manipulating Log Plot Template
Template editing basically is creating rules for next step of log plotting and cross-sectioning. LogView++ 2012 supports unlimited track, unlimited curve in a track, unlimited area in a track, and also completion track. This LogView++ version not yet supporting integer track like rock type and lithology description, which is one of the future development track of LogView++. Detailed procedures of this template editing will be discuss in the next tutorial.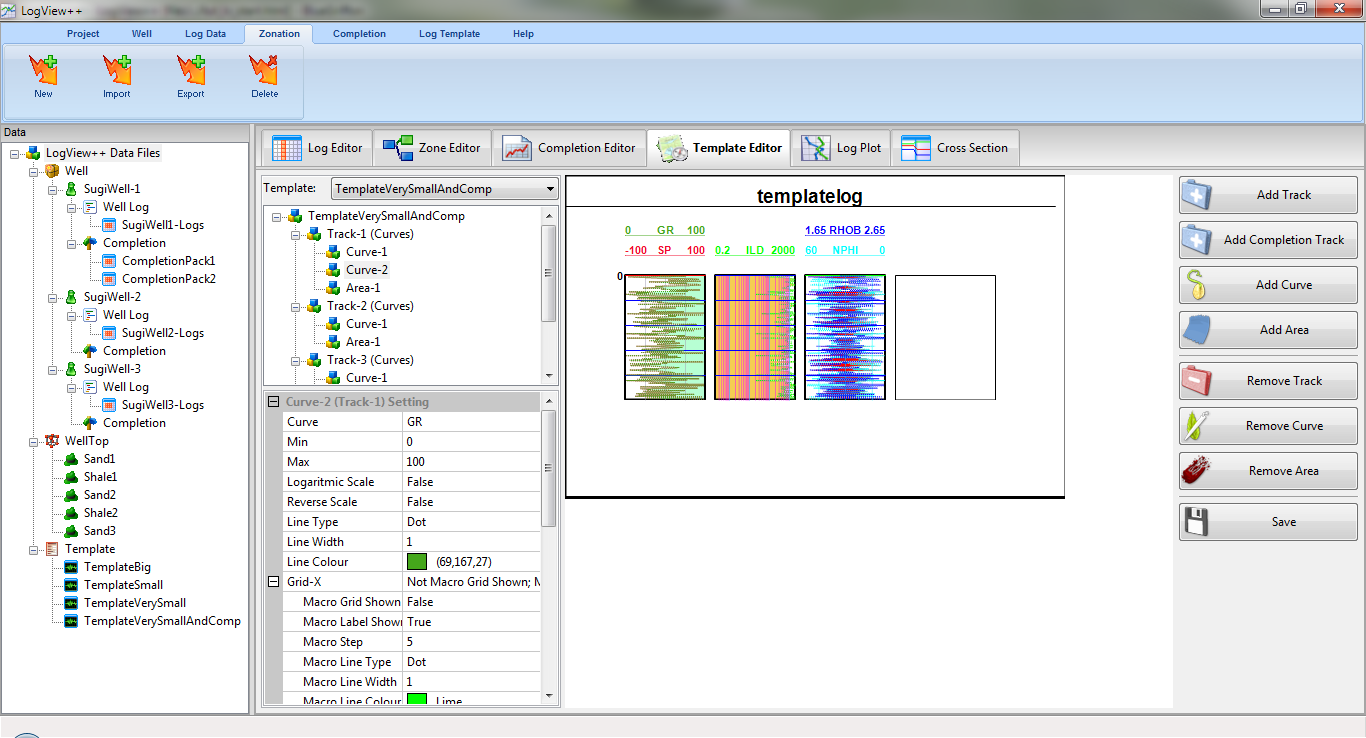
- Creating Log Plot
Log plotting is certainly the most important feature in LogView++. After a las file and a template is ready, you can easily create log plot by selecting the las and template in the Log Plot panel. Detail tutorial of log plotting is described in the next tutorial.
- Creating Cross-Section
Cross-sectioning is also one of the most important feature in LogView++. It is available only in LogView++ 2012 and newer version. Besides creating common cross section, some important feature like global template, custom depth, and flattening. Detailed cross-sectioning procedures will be discussed in this page.
This is the end of this tutorial. Should anybody have question, please don’t hesitate to contact my email.
——————————————————————–
Written by Sugiyanto Suwono
Bekasi, March 12, 2013